Close
0%
0%

Dual-Disc Polar Printer

alpha and beta instead of x and y

Similar projects worth following
Partwise the dual-disc arrangement is suprisingly simple, with
few printed parts, 2x GT2 Pulleys (top flange pulled off) and 2x lazy suzan bearings.
Right now it's a plotter, but the plan is to build a 3D printer out of this.
Mostly for its mesmerizing movements.

Plotter Prototype:

Finished 3D Printer: 

Toolchanger config:

Diamond hotend turntable timelapse:

I tried gluing the GT2 belts to the discs. Superglue holds well, but not sure how long it will last and glueing is too much of a hassle. Printing in PLA is easier, though louder.

Printed TPU belts might work if it's not too soft or it needs more mounting holes.

Omitting them alltogether and using some sort of contact wheel from an old cassette deck or an inkjet paperfeeder might work as well with low acceleration. 

All polar printers have some nice timelapse or scanning capabilities, since the print is already on a turntable.

Multi-Extruder and parallel printing is another option that has been explored by Tyler Anderson's Theta printer https://hackaday.io/project/812-theta-printer
The Formulas for cartesian to bipolar coordinates are based on his bipolar Marlin fork. https://github.com/unlimitedbacon/BipolarMarlin/
He wrote a nice script to visualize the conversion, 
unfortunately I couldn't get it to run due to the old python and sfml version being used.
If someone gets it to run, please let me know. https://github.com/unlimitedbacon/SpinSim

Brent K made another design with tool changing abilities. He used a clever way to rotate the printbed around the axis of the base platter. This way both motors are stationary.

https://youtu.be/NgIVZzDyhsA

There are more shared concepts of a bi-polar 3D printer.
The oldest one I could find is from Trent Tobler, aka BeagleFury in 2006.


https://web.archive.org/web/20100726173538/http://builders.reprap.org/2006/08/dual-disk-sketch.html
He posted more info of his printer 'RepOlaRap' on the reprap forums.
https://reprap.org/forum/read.php?152,32343,33058#msg-33058

Another thanks to Robert Menetray who provided me with all the files of his stacked polar printer.
https://web.archive.org/web/20150122132445/https://robertmenetray.com/impresora-3d-bipolar-con-enlace-sarrus

Print speed at the center needs adjustment and I ordered a hollowed shaft stepper to route the pen holder through, allowing for the full rotation of the print bed, but limiting the overall build size..

  • Turntable timelapse

    heinz07/23/2021 at 18:50 0 comments

    Polar printers have build-in turntable animations

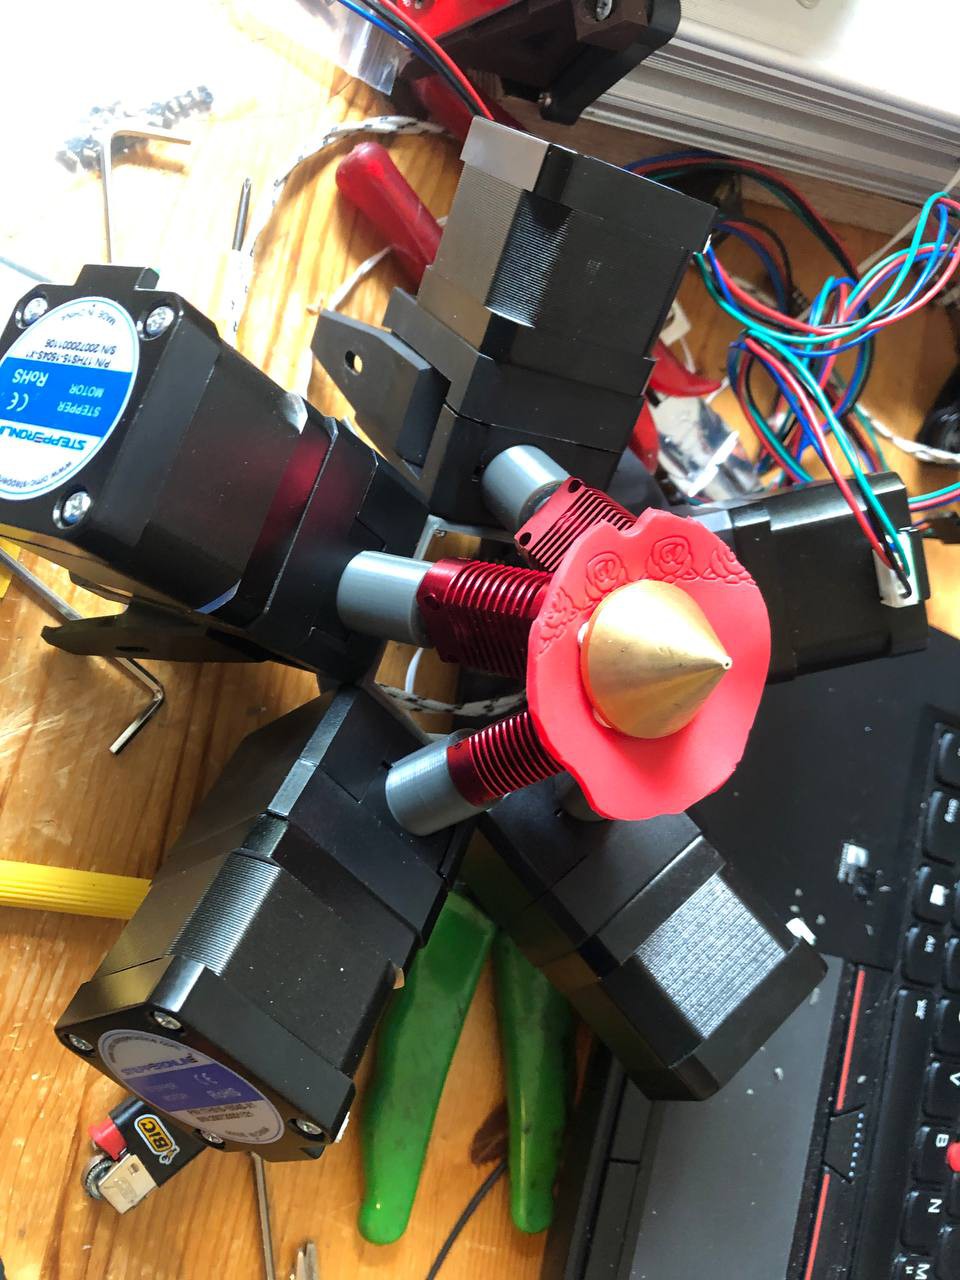
  • Diamond hotend direct drives

    heinz07/18/2021 at 05:45 2 comments

    Always wanted to mount direct drives to my diamond hotend.
    This printer design allows for some heavy toolheads, so I gave it a try.
    I used an original 5er diamond hotend with heatsinks from an Ender 3. 
    They are cheaper and fit well without any lathing down (like the original E3D style ones)
    and let you choose your own heatbreak. (again, the original heatsinks have integrated heatbreaks
    and the bowden tube is supposed to go completely down to the nozzle.)

    Now that it's done and I've printed some, the whole assembly (2kg) seems a bit unwieldy,
    so I will probably revert back to Bowden.

  • First Dual extrusion tests

    heinz06/21/2021 at 17:11 1 comment

  • It prints

    heinz06/03/2021 at 15:37 0 comments

    Drilled fiber glass sheet to print on cold bed. 

    Printing the first layer rather slow and hot to make sure the plastic seaps into the holes.

  • Drill bearing race test

    heinz05/02/2021 at 18:56 1 comment

    I'm thinking about connecting the two bigger bearings with screws, but unlike the lazy suzan bearings I have to drill holes for that.

    I had no success with a cobalt drill, but tried a resharpened masonary drill and it worked better then expected.

    Ordered a 3mm masonary and will grind it down to 2mm to maybe cut a hole in the outer race from top to bottom without entering the ball groove.

  • Move origin for toolchange

    heinz04/24/2021 at 13:36 0 comments

    You can change tools now by just adding T0 or T1 to the Gcode.
    On toolchange the Gcode enters absolute mode (G90), move to other tool and then back to relativ mode (G91).
    This way the calculations of cartesian to bipolar doesn't have to change and 
    additional tools can be added fairly easily. 
    With 'only' 4 tools you get the benefit that no tool overlaps with the built area of the other tools.
    So you need no separate z-axis for every tool.

    And some goofy distortion when starting off-center:

  • Toolchanger alignment test

    heinz04/16/2021 at 10:53 0 comments

    Added a leadscrew to the Z-axis and tested the alignment of different tools.
    Looks promising, as long you start excactly at the center of the bed.
    With two pens at different origins, the initial position becomes even more critical.
    I need a better way to adjust the xy position of the pen on the Z-axis to calibrate the start position,
    but better do that directly when installing the hotends for a first print.

    One big error, I only noticed when adding the gear around the Z-axis in my last post, was that I didn't compensate for the additional rotation (around itself) of the bed while it is orbiting around the Z-axis/sungear.
    In the first version the sungear was so small that the slight distortion wasn't that visible.
    It became more obvious when increasing the size of the sungear for fitting the leadscrew and rods.

  • Z-axis

    heinz03/26/2021 at 12:25 5 comments

    I added another gear with a hollow shaft in the middle to route the z-axis through.        
    Had a look at nema17 motors with a hollow shaft, but they unreasonably expensive, at least with a hole >10mm.

    Z-axis in the middle of the assembly makes the overall footprint smaller, but limits your bed size if you want to be able turn around the whole pole.
    For a multiple hotend setup a small bed would be okay, since this way parts on the bed can't collide with the other nozzles, 
    because individual build areas don't cross eachother.

    After the rebuild the testprint came out skewed, not sure what caused this.
    The gear ratios shouldn't have changed. Maybe the pen/bed was slipping, have to investigate further..

View all 8 project logs

Enjoy this project?

Share

Discussions

Liam wrote 5 天前 point

jou should sell these 3d pritners

  Are you sure? yes | no

Trevor Johansen Aase wrote 01/30/2022 at 20:44 point

Are you still developing this idea? Also, and parts listing and drawings so I could take a swing at my own?

  Are you sure? yes | no

Dan Maloney wrote 02/12/2021 at 18:40 point

The kinematics seem daunting. Glad you figured them out. Nice job, reminds me a bit of Bart Dring's "Polar Coaster" printer.

  Are you sure? yes | no

ekaggrat singh kalsi wrote 02/11/2021 at 22:38 point

why not simply wrap the belts around and stick them in a notch on the disk?

  Are you sure? yes | no

heinz wrote 02/12/2021 at 05:43 point

That's a good idea!

The lazy suzan bearings have enough material left to cut a notch.
You lose the option to put the teeth on the inner diameter though.
(I love your designs by the way..)

  Are you sure? yes | no

Similar Projects

Does this project spark your interest?

Become a member to follow this project and never miss any updates