Rebuilding the whole thing
As you might have seen in this post, my grbl shield is broken and I’m in the process of replacing it with a gaups shield from ASL. When my new shield is assembled it is my plan to build some sort of casing for it (mostly for protection). Furthermore, I’ve decided to make my ShapeOko 2 larger so I’ve ordered some new parts for it (longer MakerSlides among other things). I then realized that my dust collecting cyclone (made by a friend of mine) has to be remade as well to support the larger ShapeOko 2 in my workshop and to get it out of the way, when I use the ShapeOko. Any project has a tendency to grow on it’s own… 🙂
Cyclone
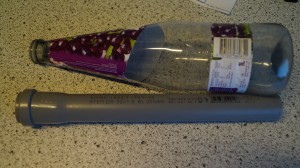
My old cyclone has been working very well so I’m not going to discard the basic idea: My friend who is a chemical engineer discovered that an empty bottle from a particular brand of soft drink has a cone shape, that fits the theory behind a cyclone very well (actually nearly perfect). Furthermore, it’s my plan to mount it on the wall and use pipes to get the dust collection where I need it, so I went looking for pipes that will fit the hose on my vacuum cleaner. As it turned out a 32 mm plastic pipe fits perfectly.
The theory of cyclones
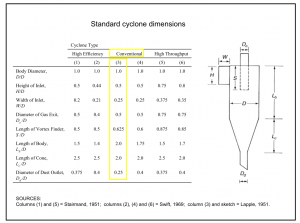
I’m not an expert in cyclones so I went looking for information about cyclones on the Internet and Thayer School of Engineering at Dartmouth turned out to have a pdf from a course on their homepage, that explains everything very well. Especially the drawing below was helpful:
Calculations
Since the cyclone diameter D, the dust outlet diameter Dd, the gas outlet diameter De and the cone length Lc all are defined either by my bottle or by the vacuum cleaner hose, the remaining calculations are easy. The values measured on my bottle are:
- D = 75 mm
- Dd = 26 mm
- Dc = 29 mm
- Lc = 160 mm
This gives the following values:
- D/D = 1
- De /D = 0,39
- Dd /D = 0,35
- Lc /D = 2,13
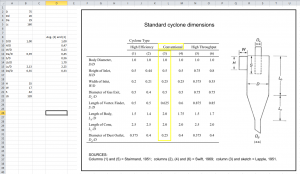
These values lies somewhere between (2) and (3) in the standard cyclone dimensions, so I decided to aim at a cyclone with dimensions as an average of the values of (2) and (3). I know it won’t be perfect but hopefully it will work just fine. My calculations are:
Drawing in OpenSCAD
Then it’s time to make a drawing in OpenSCAD (I love that program). The drawing below is what will become the inside of my new cyclone. Here is the OpenSCAD file: Cyclone and the STL files.
It looks like this:
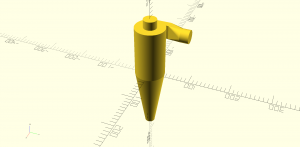
The cone itself and part of the body is made out of my bottle and the top will be milled in wood on my ShapeOko. The top will be four slices 20 mm thick: One with a 32 mm hole for the vacuum cleaner hose, one with a 80 mm (the outer diameter of my bottle) hole holding the bottle and two pieces that glued together will form the inlet. The last two parts look like this:
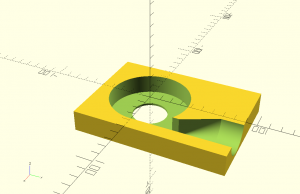
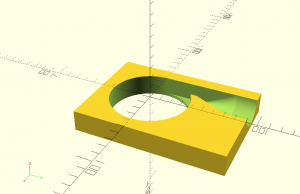
Milling the parts
I used ArtCAM Express to generate the g-code for milling the parts. The finished result is here:
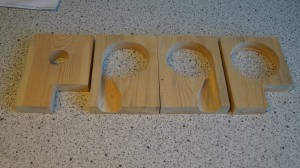
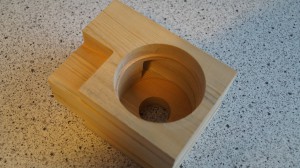
Notice that the inner diameter of the cyclone is 75 mm and the fourth piece has an 80 mm recess for holding the bottle. Furthermore, my calculations above suggested that the value of Lb should be 128 mm but the height of the inlet is about 40 mm, so I cut my bottle at 88 mm from the top of the cone in order to make the entire height 128 mm.
More will follow… 🙂